
FaceTime calls are a great way to stay in touch with people you care about, whether on an iOS device or a Mac. But what do you do if you want to save those special moments? Luckily, using your Mac, you can record those calls to view later.
Here’s how you can record FaceTime calls taken on both Mac and iPhone.
How to record a FaceTime call on your Mac
If you’re looking to record a FaceTime call on your Mac, you can use QuickTime’s screen recording feature to your advantage.
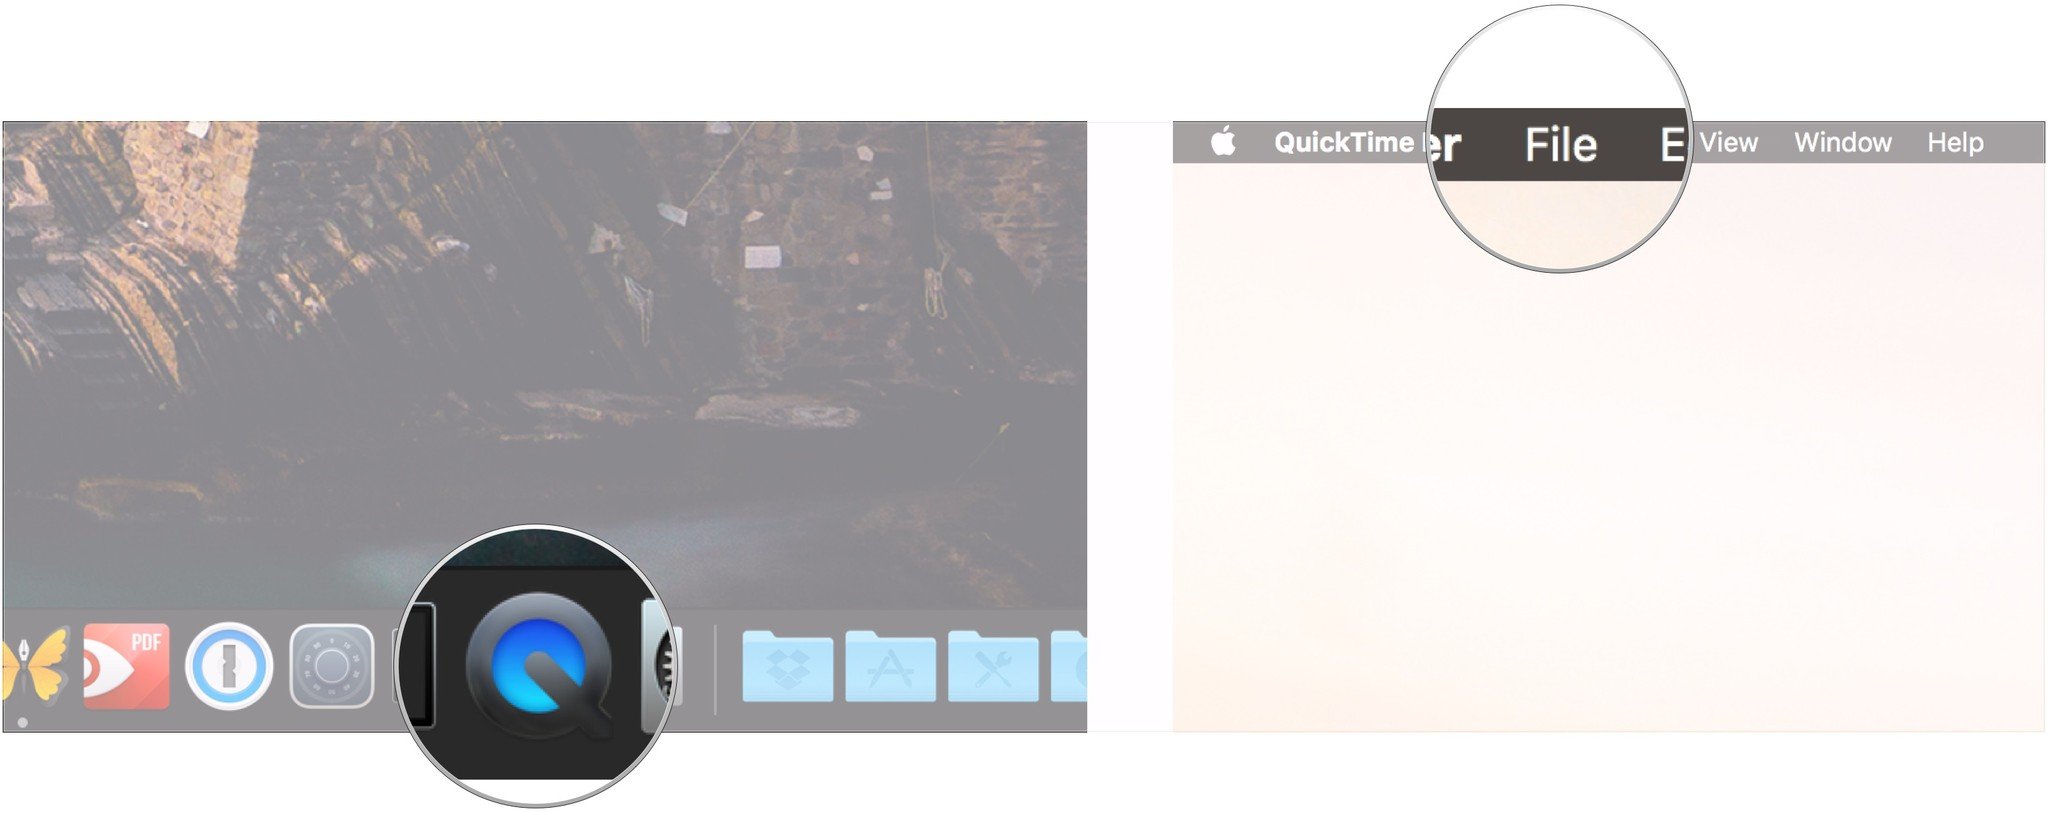
- Open QuickTime on your Mac from your dock or your Applications folder.
- Click File in the Menu bar.

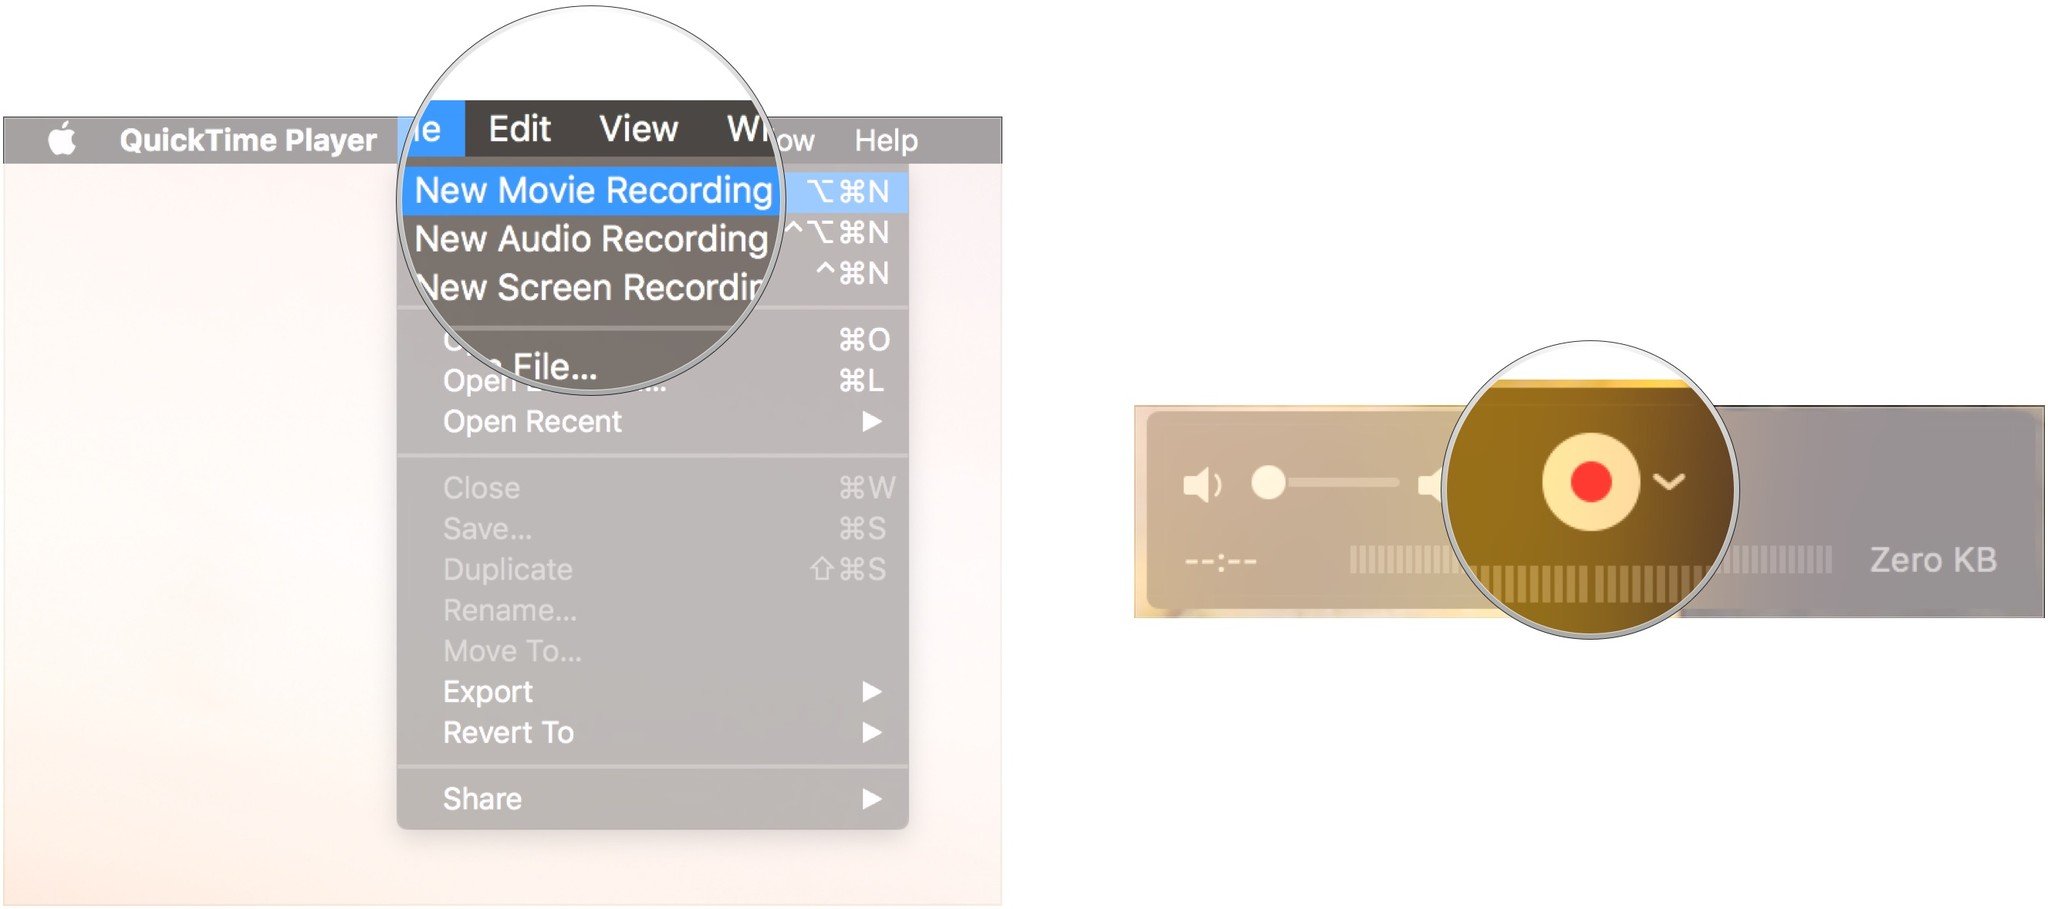
- Click New Screen Recording.
- Click the arrow next to the record button in the QuickTime window.

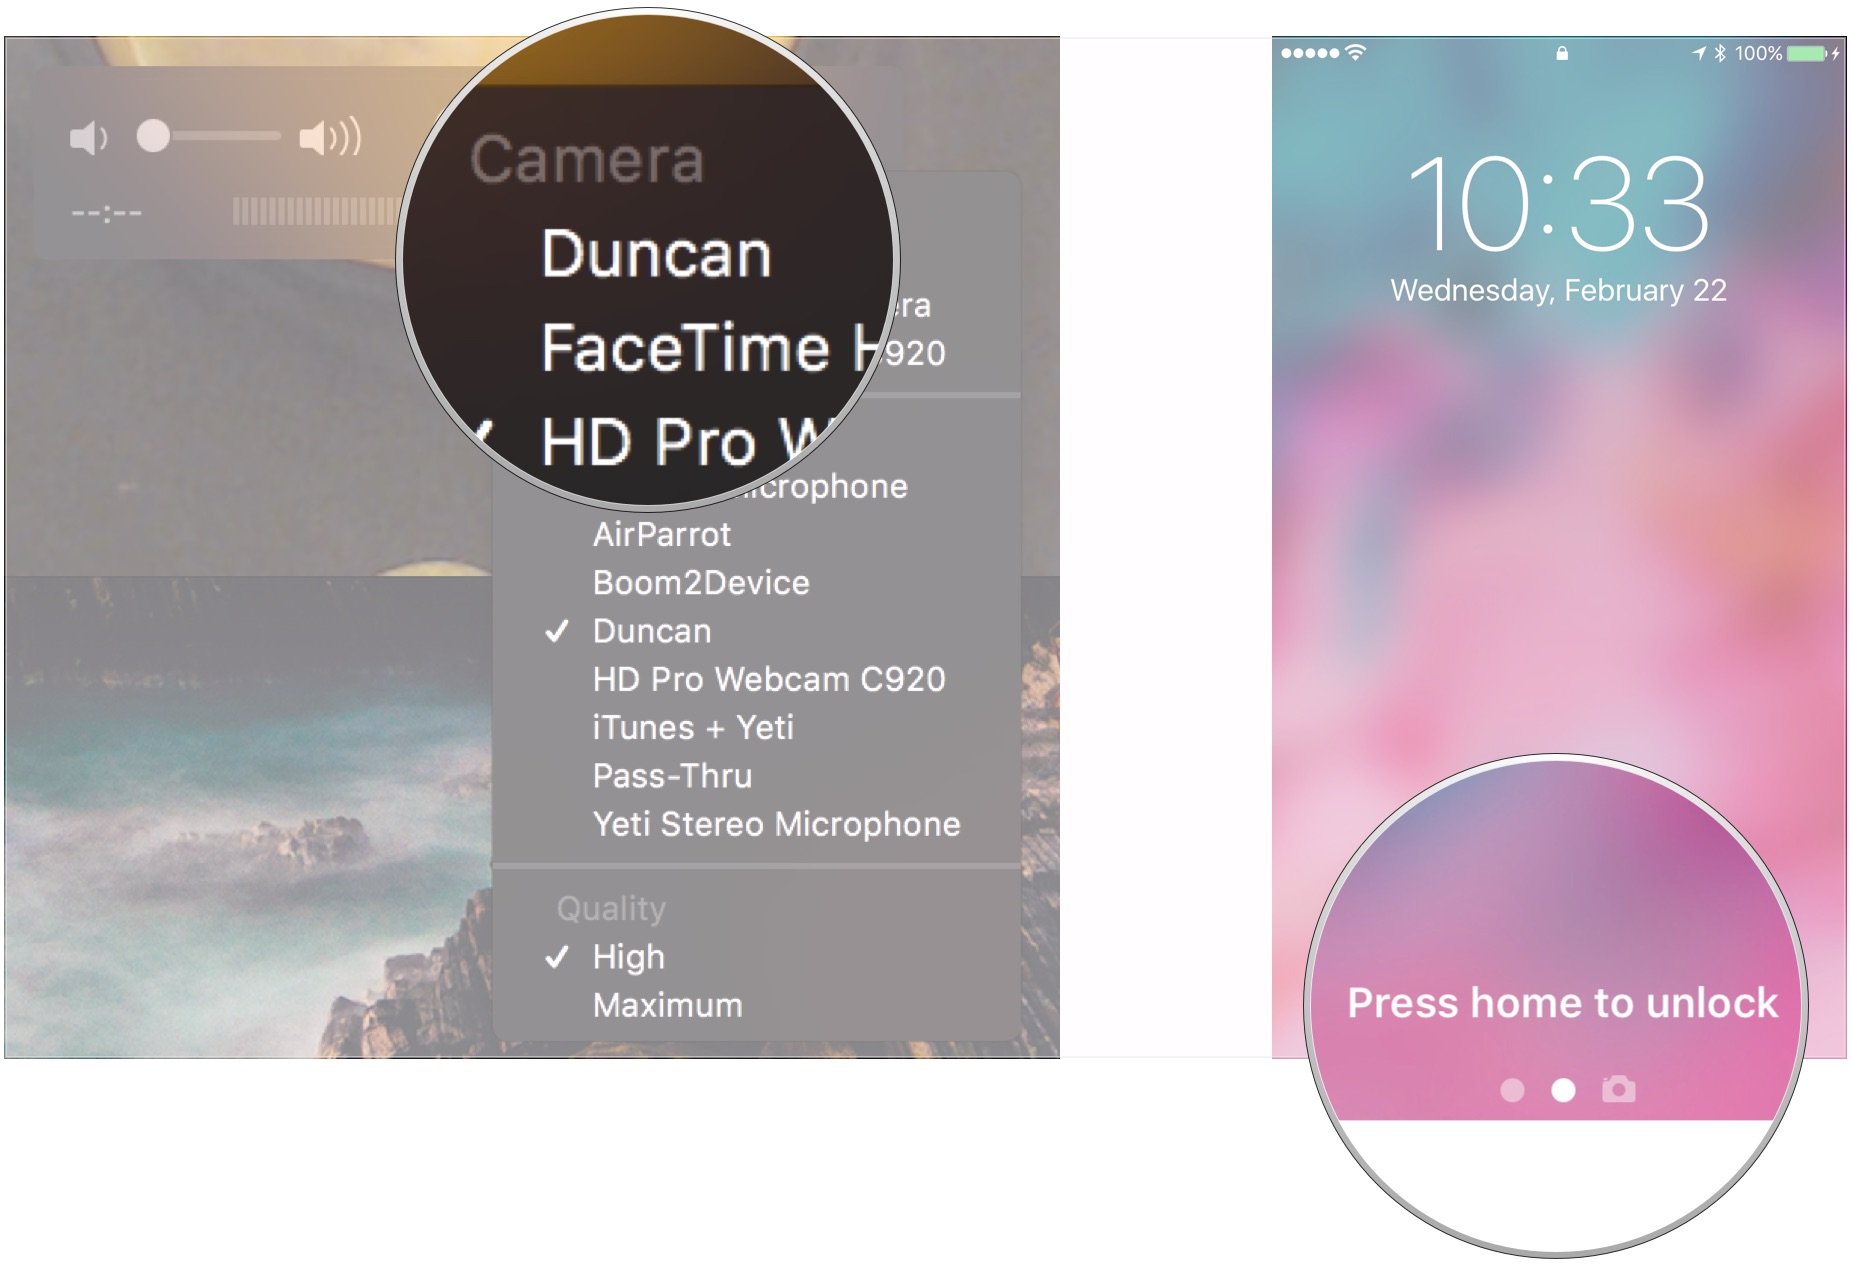
- Choose Internal Microphone from the list of available microphones.
- Open FaceTime.

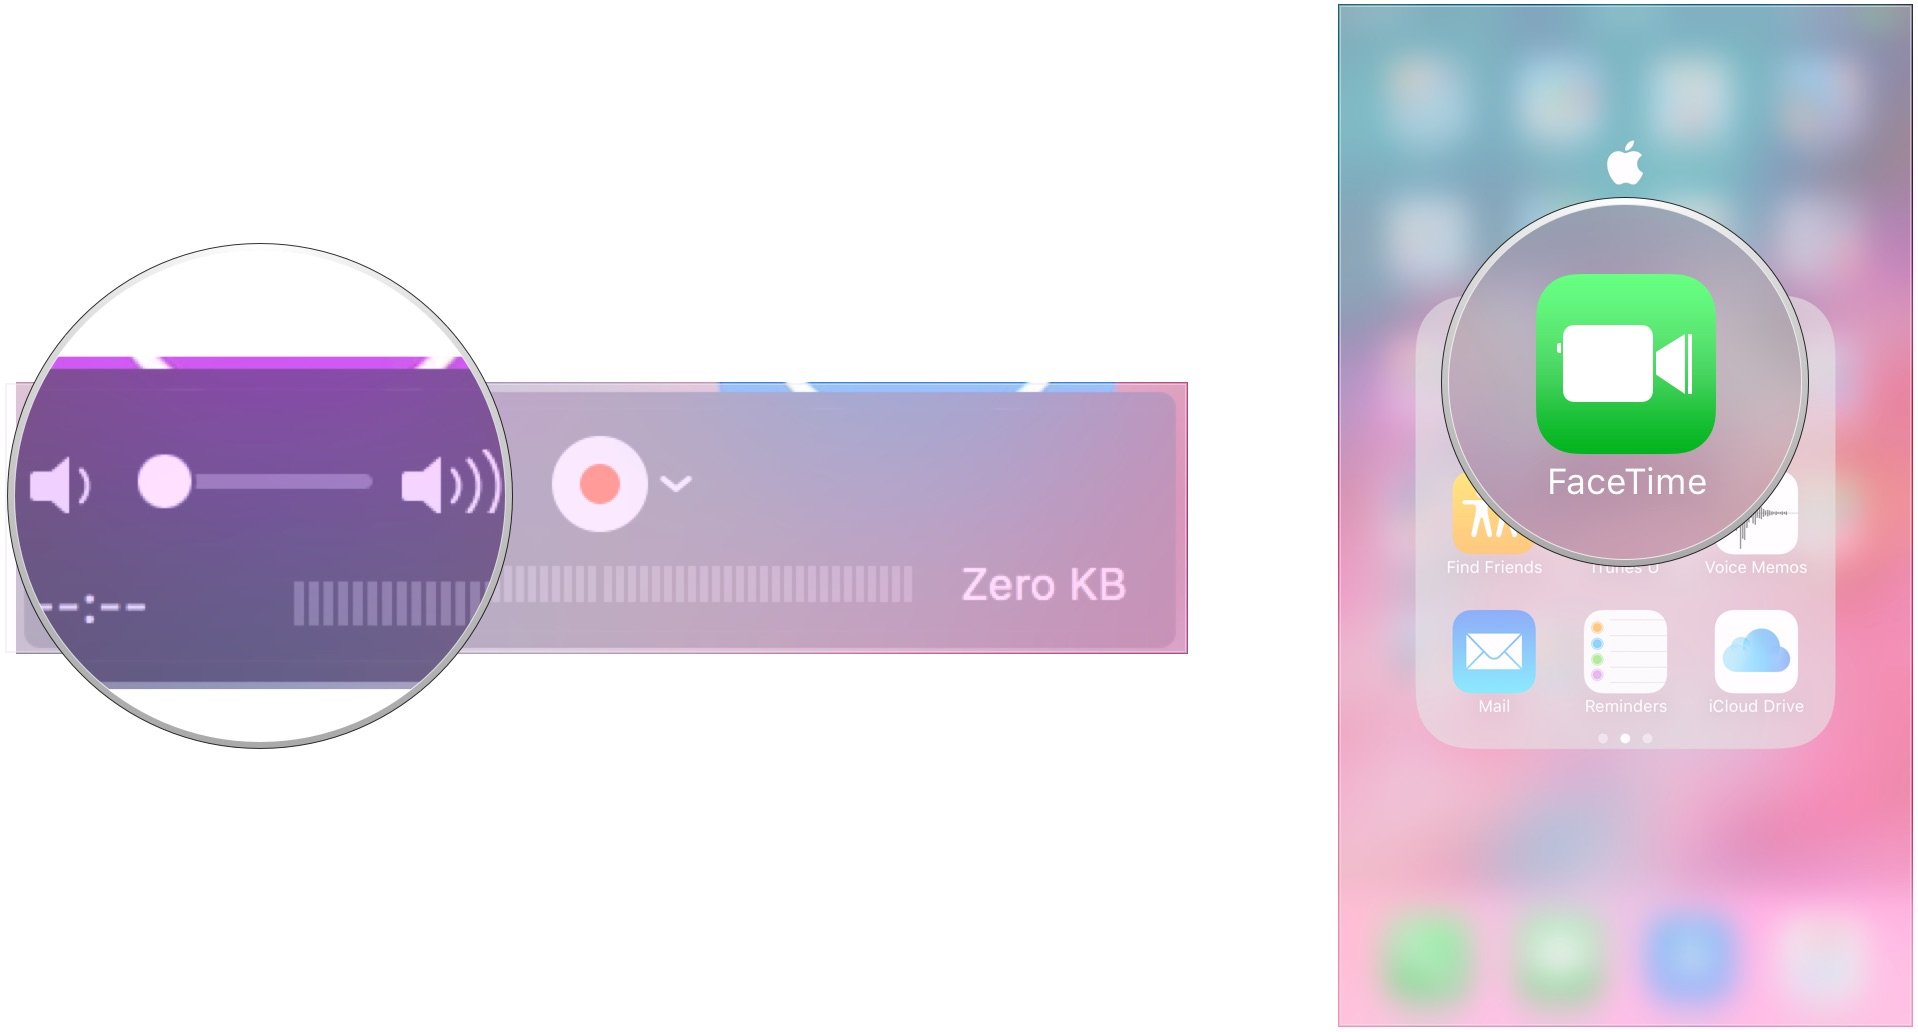
- Click the record button in QuickTime.
- Click the screen to record your whole screen, or click and drag over the FaceTime window to only record FaceTime.

- Start your FaceTime call.
- Click the Stop Recording button in the Menu bar.

- Click File in the Menu bar.
- Click Save.

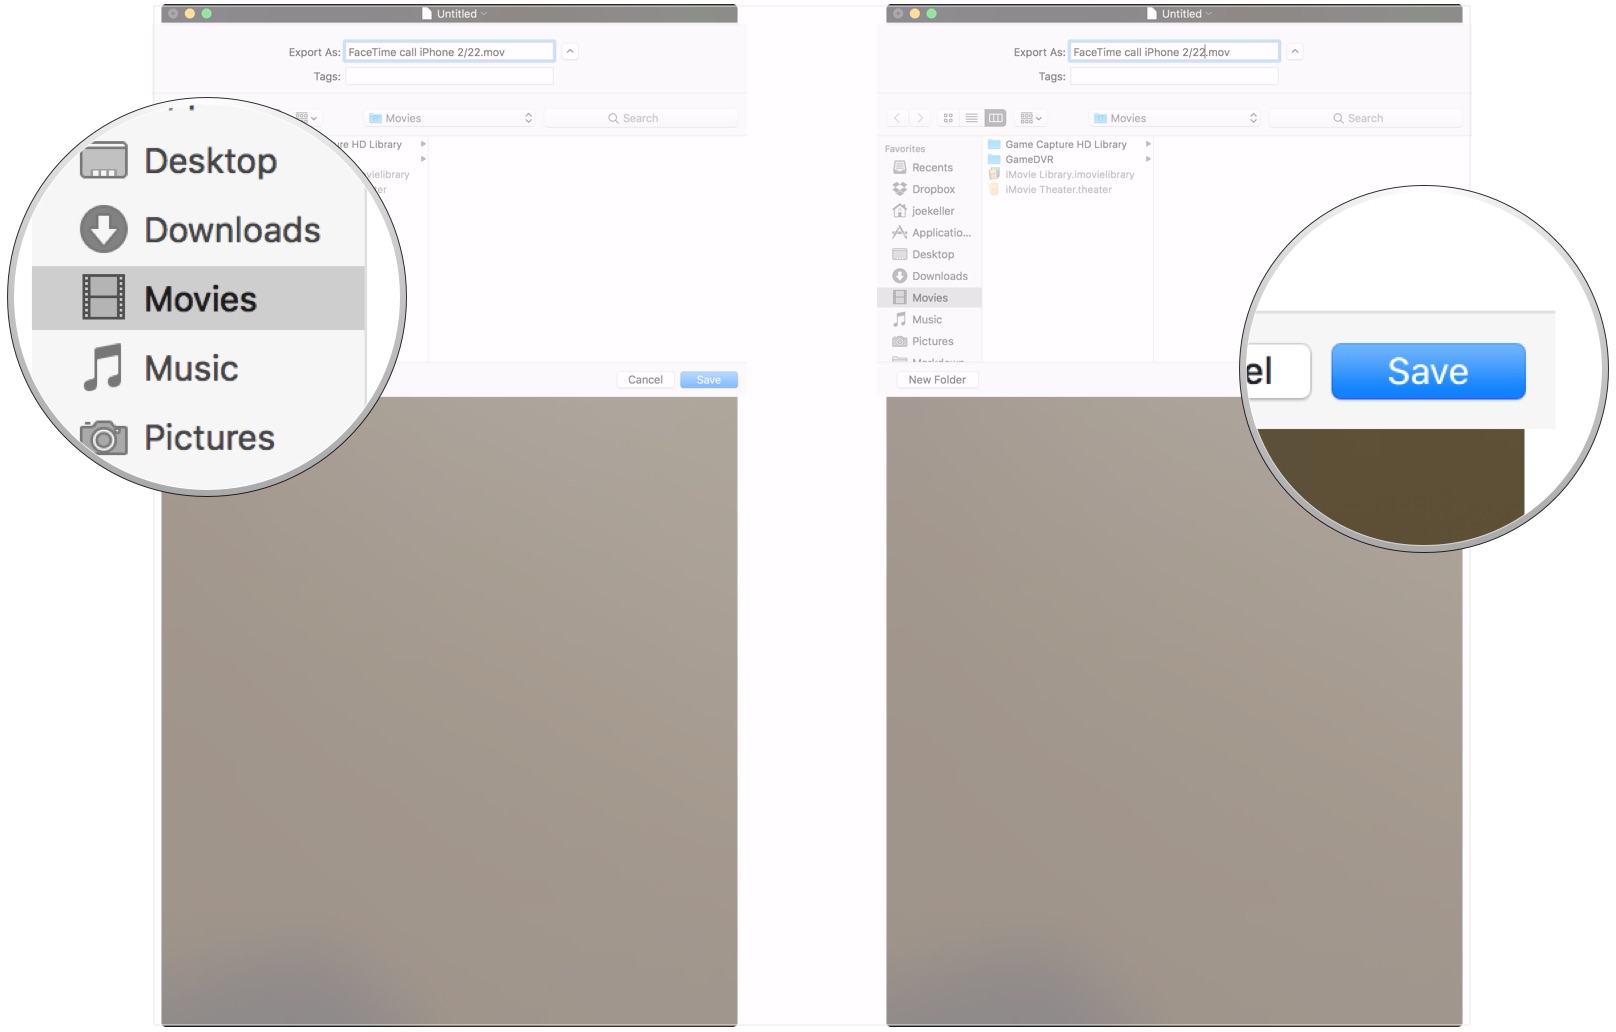
- Give your recording a name.
- Choose where you want to save your recording.

- Click Save.

How to record a FaceTime call on your iPhone using your Mac
First things first: don’t. Since you can’t record your screen natively on your iPhone anyway, you need a Mac for this, and you can already record FaceTime calls on your Mac (I mean, you are reading this whole guide, right?).
However, if you insist on recording a FaceTime call on your iPhone using your Mac, here’s how.
- Connect your iPhone or iPad to your Mac with a Lightning cable or 30-pin connector.
- Open QuickTime on your Mac from your dock or Applications folder.
- Click File in the Menu bar.
- Click New Movie Recording.
- Click the arrow next to the record button in the QuickTime window.
- Choose your iPhone from the list of available cameras.
- Unlock your iPhone. Its display should now appear in QuickTime on your Mac.
- In QuickTime for Mac, make sure the volume bar is turned up. Otherwise, you won’t be able to hear your call, and what would even be the point of having it?
- Open FaceTime on your iPhone.
- Click the Record button in QuickTime on your Mac.
- Place your FaceTime call on your iPhone.
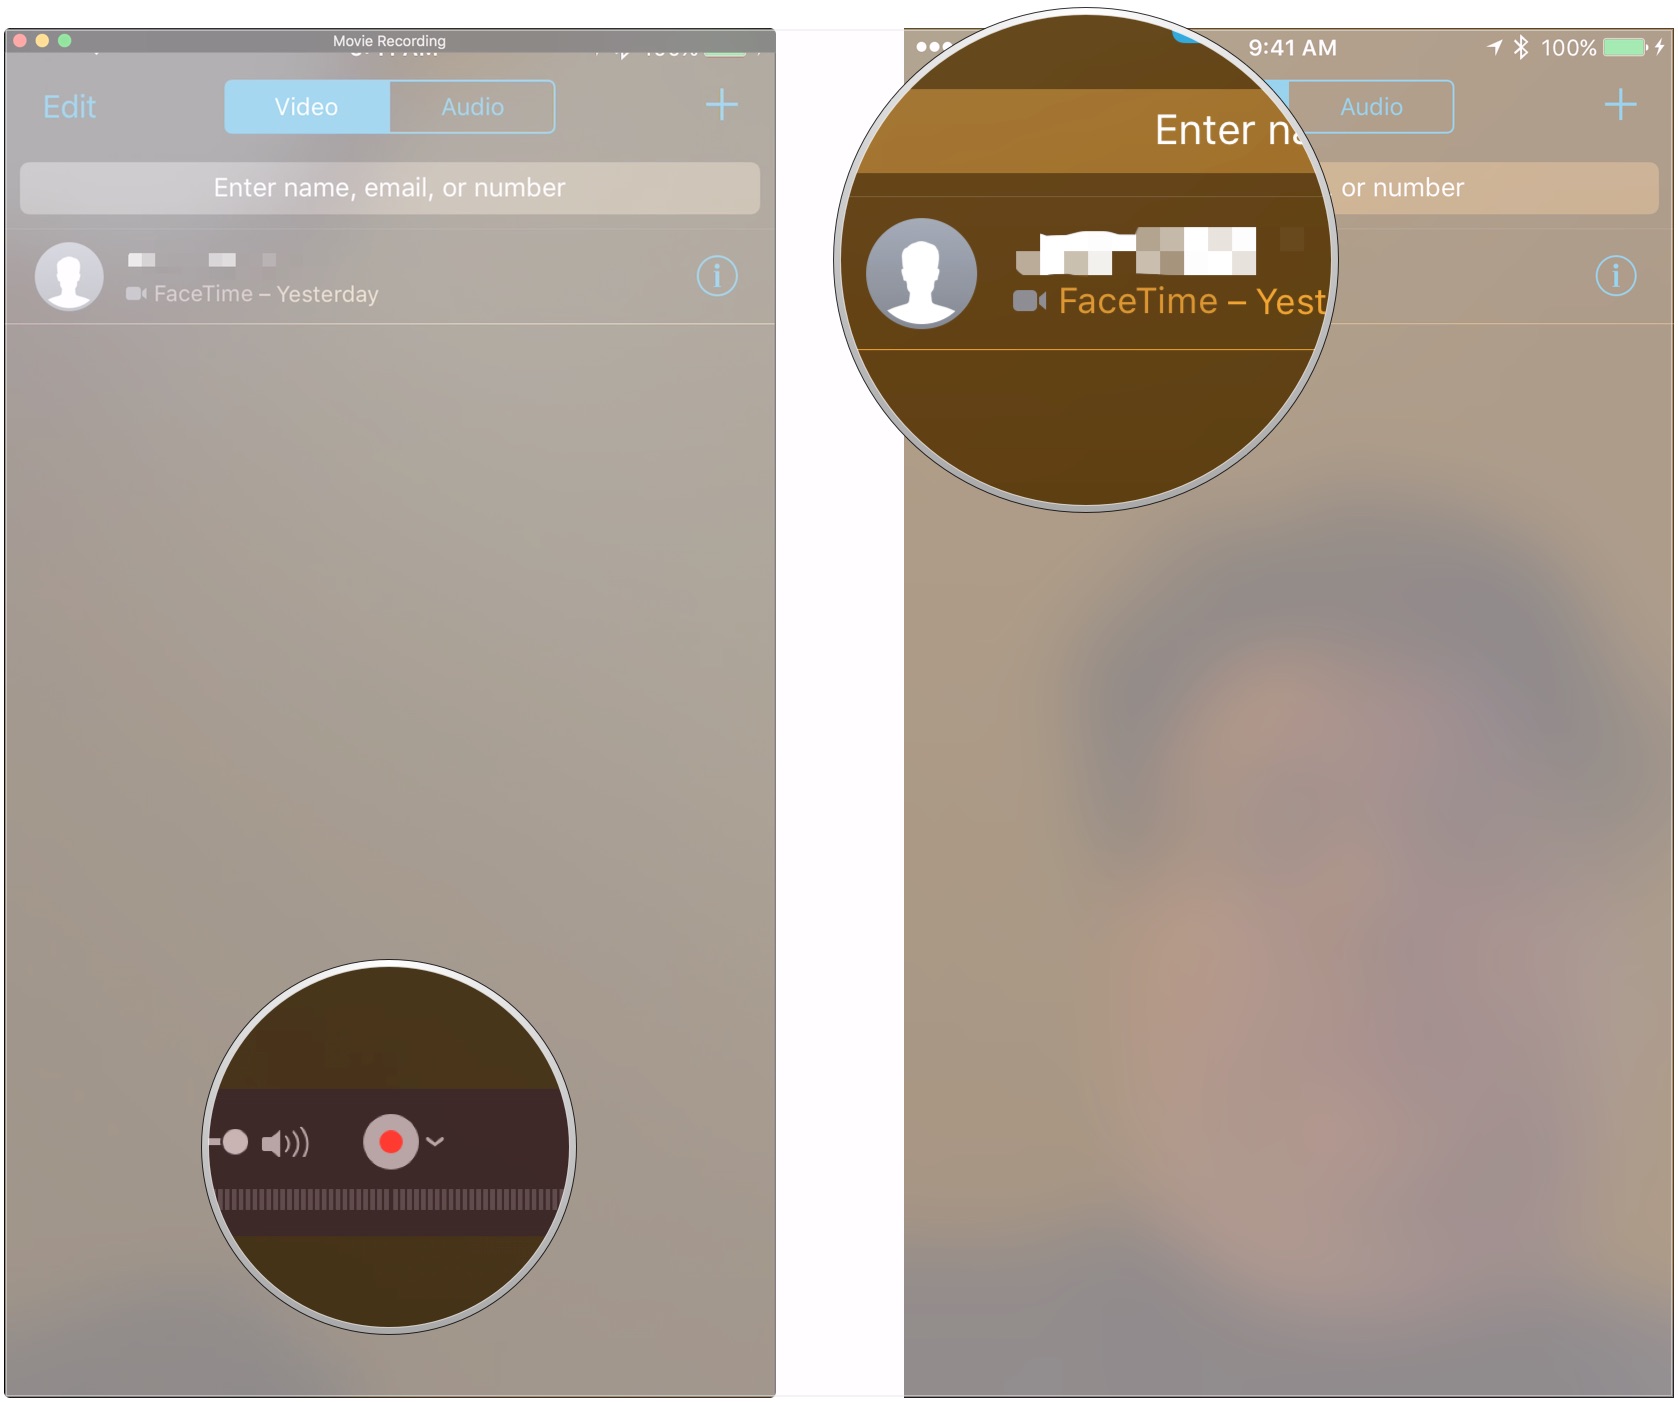
- Click the Stop button in QuickTime to stop recording when you’ve finished your call.
- Click File in the Menu bar.
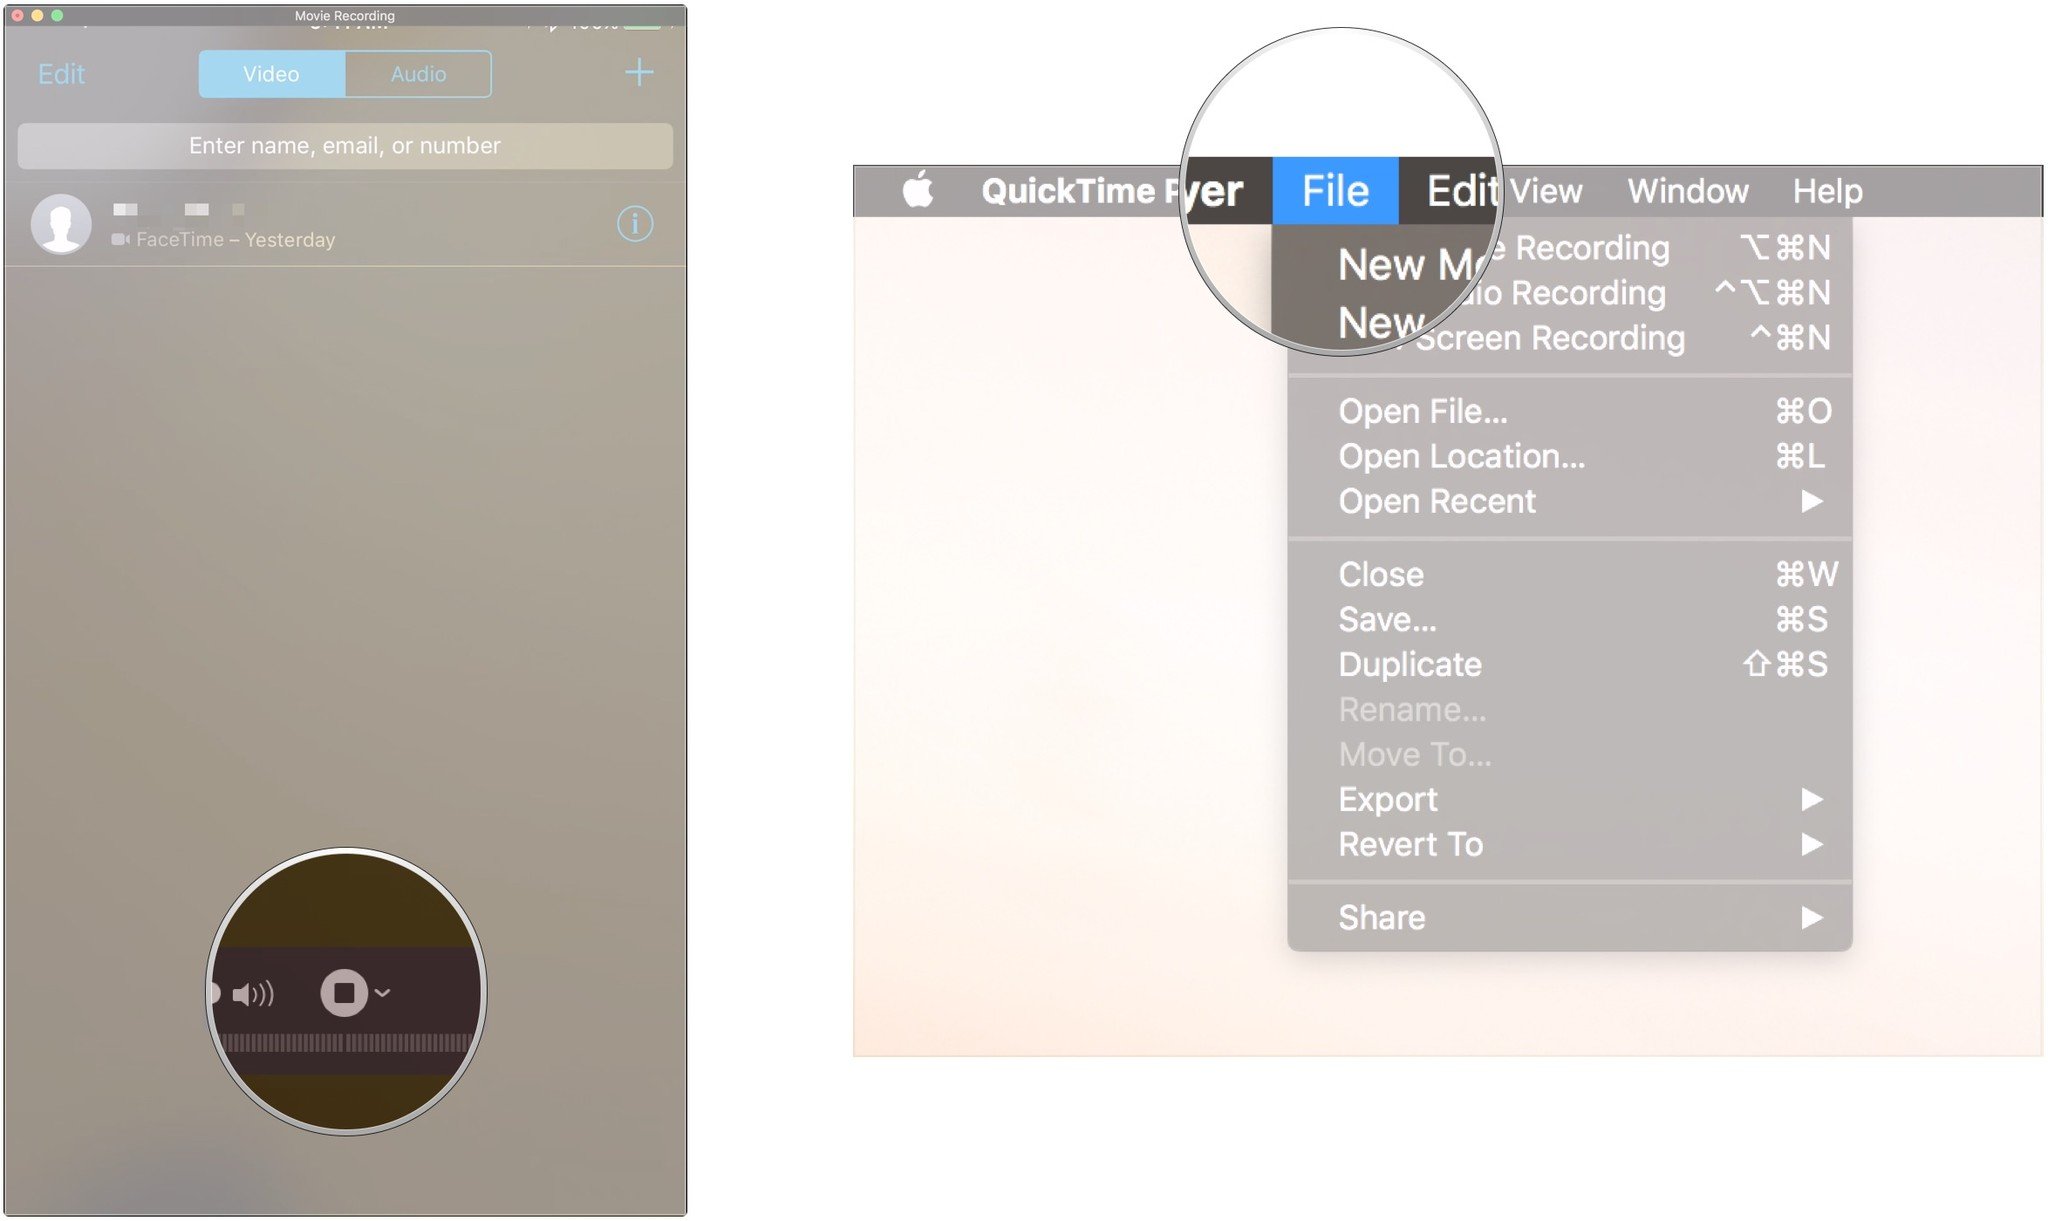
- Click Save.
- Give your recording a name.
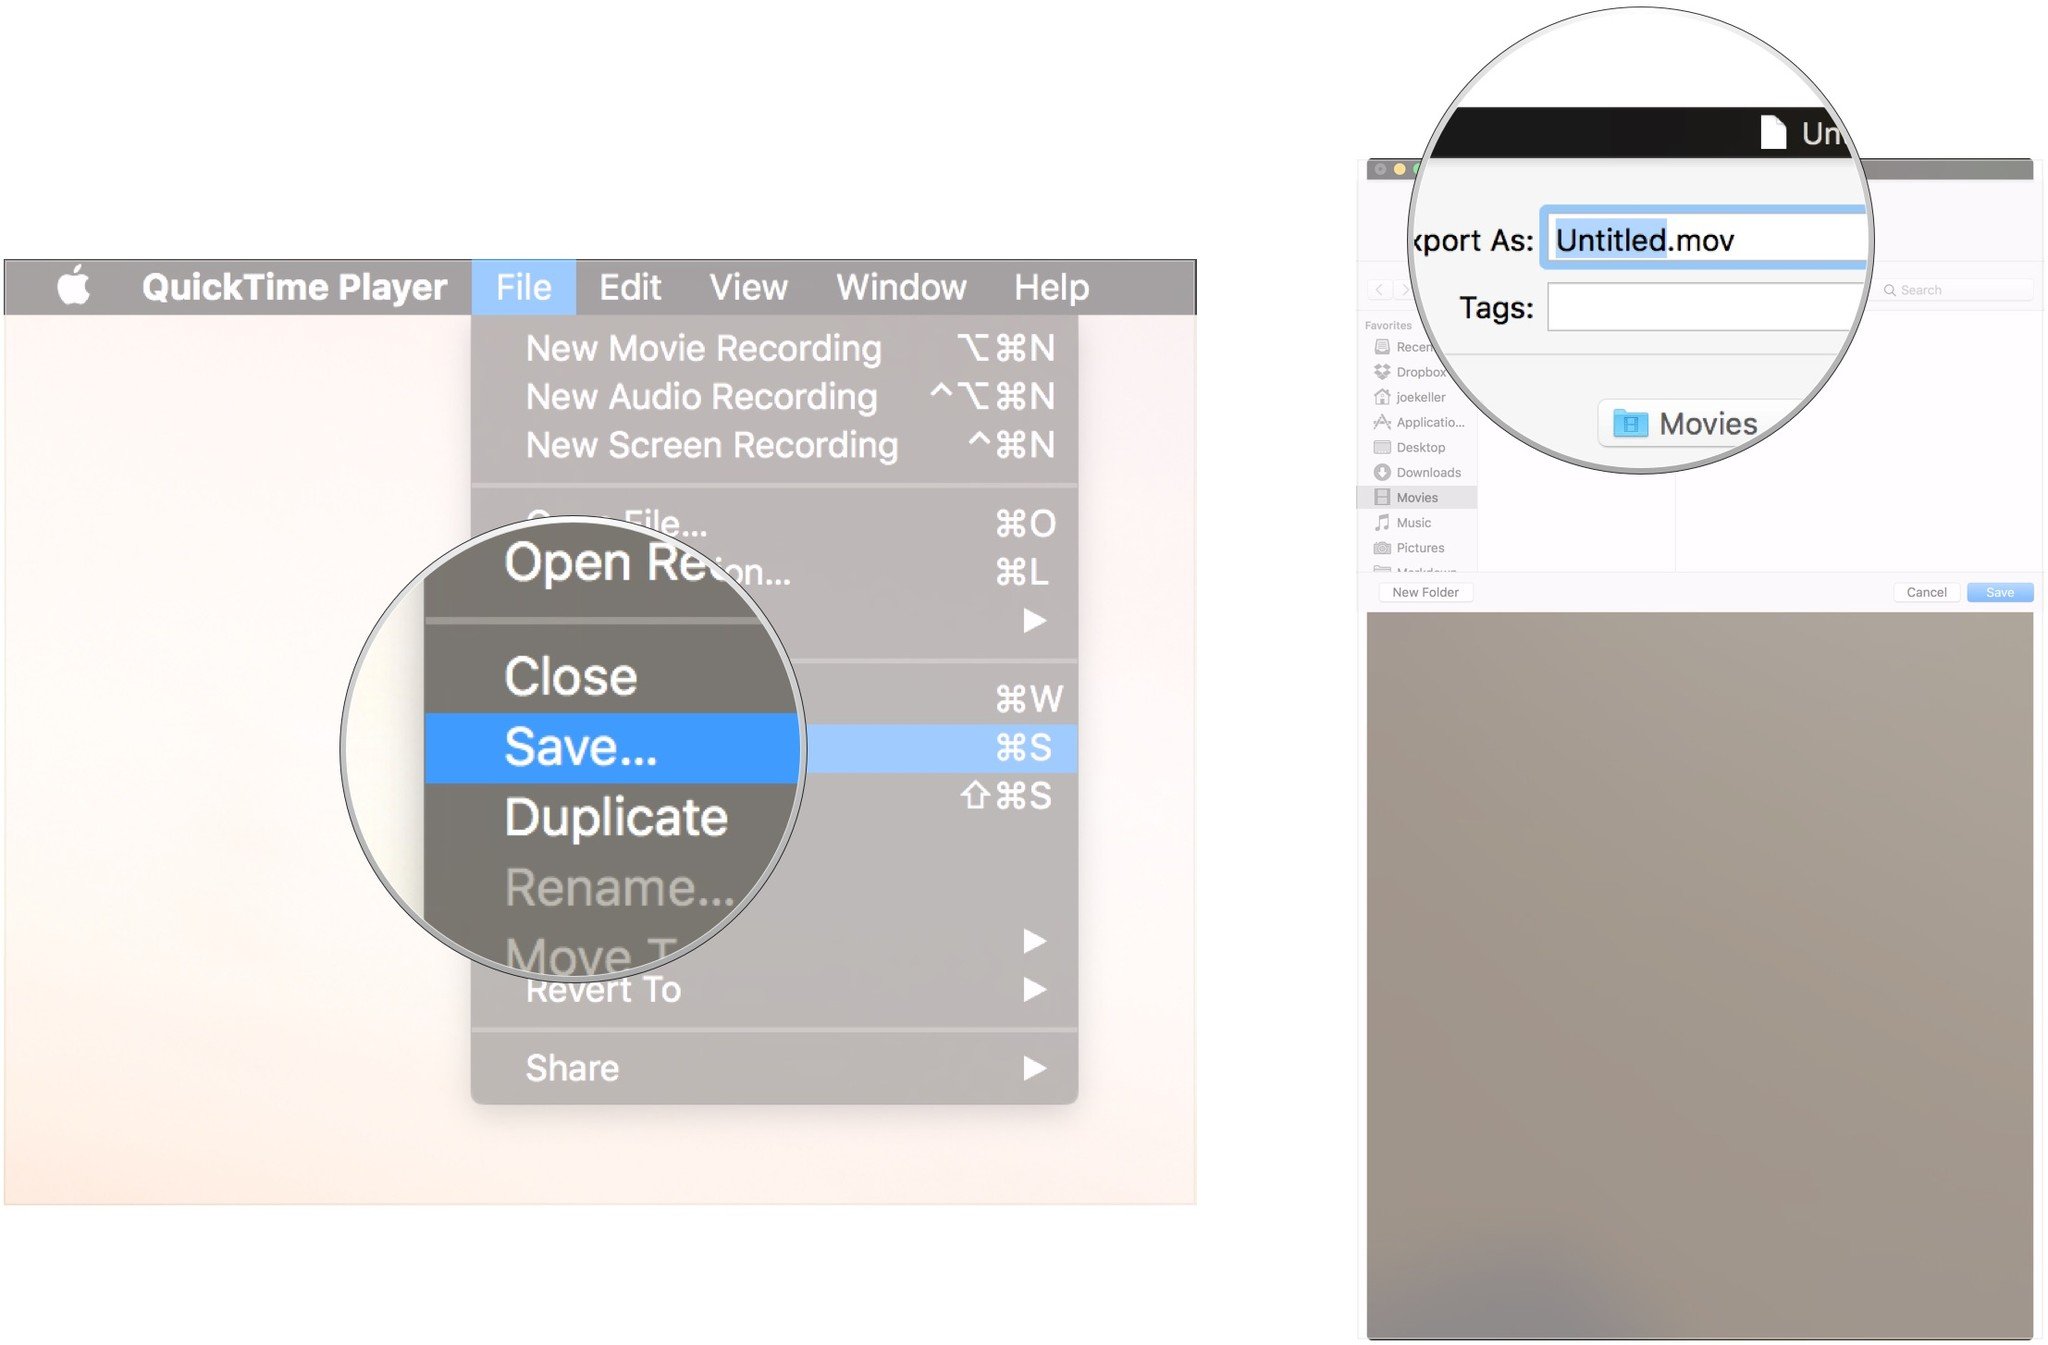
- Choose where you want to save your recording.
- Click Save.
How to use third-party software to record a FaceTime call
If you want your recorded FaceTime calls to look a little more polished, Ecamm’s Call Recorder for FaceTime not only lets you record your default FaceTime window — it also offers basic audio editing after you record, repositioning of the call window, and split-screen or side-by-side modes. It’s often the better option if you’re recording your FaceTime calls for professional use or YouTube uploads. iMore’s Serenity Caldwell uses this software to record instructional video with faraway skaters to give how-to tips and advice.


